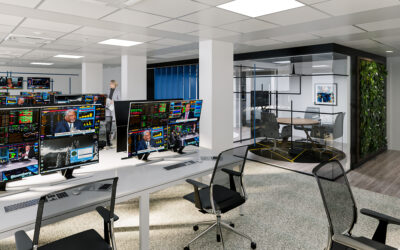

3D visualisation is a booming industry. We have all seen some forms of 3D techniques in action in movies, shows, and video games. Recently, the 3D industry has expanded to take over other fields as well, like architecture and manufacturing. Creating 3D images is no longer limited to creating cartoon characters. It has become more sophisticated.
3D visualisation is one of the advanced processes used in high-tech industries like architecture. It is used to produce real-life 3D graphics of what could become million-dollar products in the future. It helps streamline the actual manufacturing process, reduce errors in the real products, and can speed up production.
If you are looking to get started with 3D visualisation, keep reading for the steps to know and follow.
What Is 3D Visualisation?
Before getting ahead with 3D visualisation, understand what the term means. Each branch of 3D design is closely related, and they may even use the same basic software to accomplish the result, but they each entail a different function.
3D visualisation is the process of creating a three-dimensional graphical image of a product or a piece of architecture to show what it will look like in real life. In this, 3D software is used to build a graphical representation of the real-life product on a digital screen. The products are built to scale to give you an immersive experience and not just an idea of the product but the whole picture from all sides.
7 Steps to Get Started with 3D Visualisation
Since this is not a very common field, you may be stumped about getting started with 3D visualisation. Let’s look at some of the steps that will help you in the process.
- Understand the Tools Used
All 3D visualisation images are built with 3D software. CAD software is a common tool used to build a product based on the exact specifications of the manufacturer. If you want to incorporate 3D visualisation into your business, you need to be aware of the tools and software used for the process. Since there are several tools out there, you need to pick one that best matches your needs, like the budget you have and the outcome you want.
Some software may have more features than others. You may not need all the features of extensive software, so paying for them would be a waste of money. Know what you want and which software could achieve it.
- Test a Free Version of the Tool before Buying It
The best way to choose a tool for 3D visualisation is to test it first. Most software will allow you to use their free version that allows you to use the software or some of its features for a limited time. Download the free trial, try all the features you get, and proceed to buy if it fits your goals and desired outcomes.
- Ask Questions and Get Acquainted with the Result
For the best outcome, you need to ask a lot of questions. If some details need clarifications, make sure to keep asking questions until you are clear on all the major and minor details. Sometimes, the client may not be clear on what they want. This shouldn’t deter you. In this case, dig deeper and try to get the maximum amount of information beforehand, or else revisions can waste a lot of time.
- Get Comfortable with the Process
3D visualisation is a process, and you will encounter several new concepts. You need to get comfortable with the learning curve of the process, practice more, read more about it, and keep updated on what’s new in this field.
- Learn 3D Modelling and Animation
3D modelling is the creation of three-dimensional products by bringing and meshing together different shapes like cubes and squares. Animation is what enables our favourite characters to come to life on cartoon shows.
Learning about 3D visualisation is not limited to visual 3D graphics. It involves working with several adjacent concepts such as modelling and animations. Working in 3D visualisation requires that you familiarise yourself with the other techniques too.
- Build Several Renderings
If there are not many specific instructions about the product, make sure to build several renderings of the design. This reduces time wasted on minor revisions, as there are already different representations with slight changes.
- Revise before Presenting the Final Outcome
If clear instructions have been given, follow them. Make sure your details are correct. Go through the instructions and make any revisions if necessary before presenting the final product.
Conclusion
Ultimately, 3D visualisation is a difficult and niche field. Few people can work on a professional level without professional training in CAD and 3D software. We here at 3D Lines are experienced in 3D visualisation and can assist you if you’re looking for a professional 3D visualisation artist for your next project.